Wiring Bonsai: The Art of Shaping and Training Your Miniatures

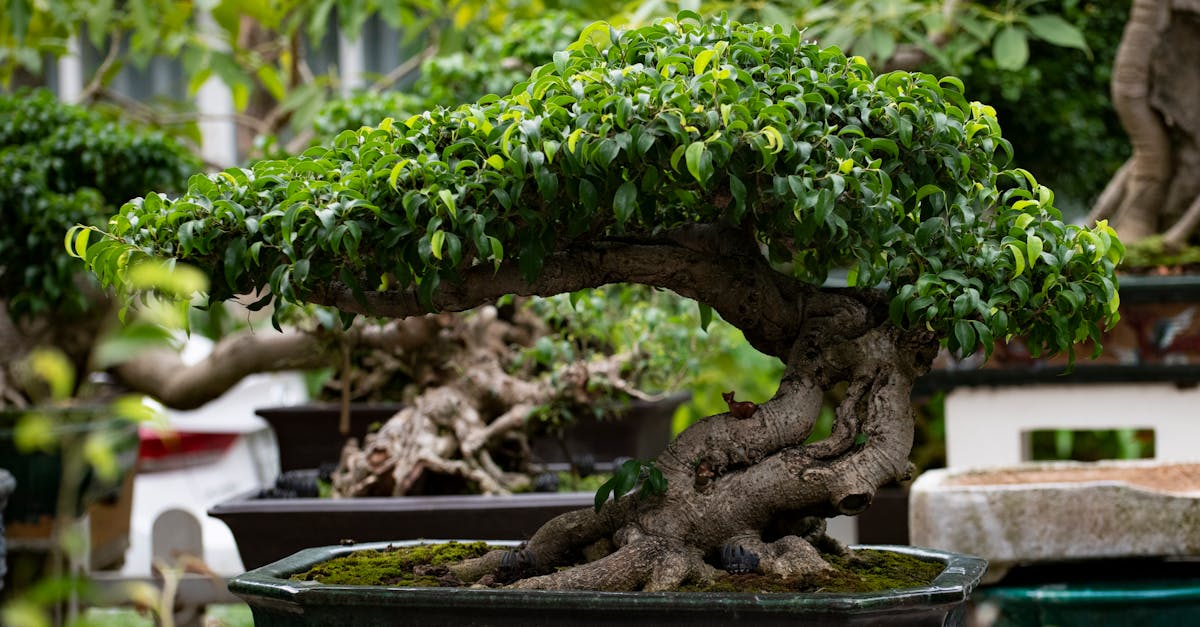
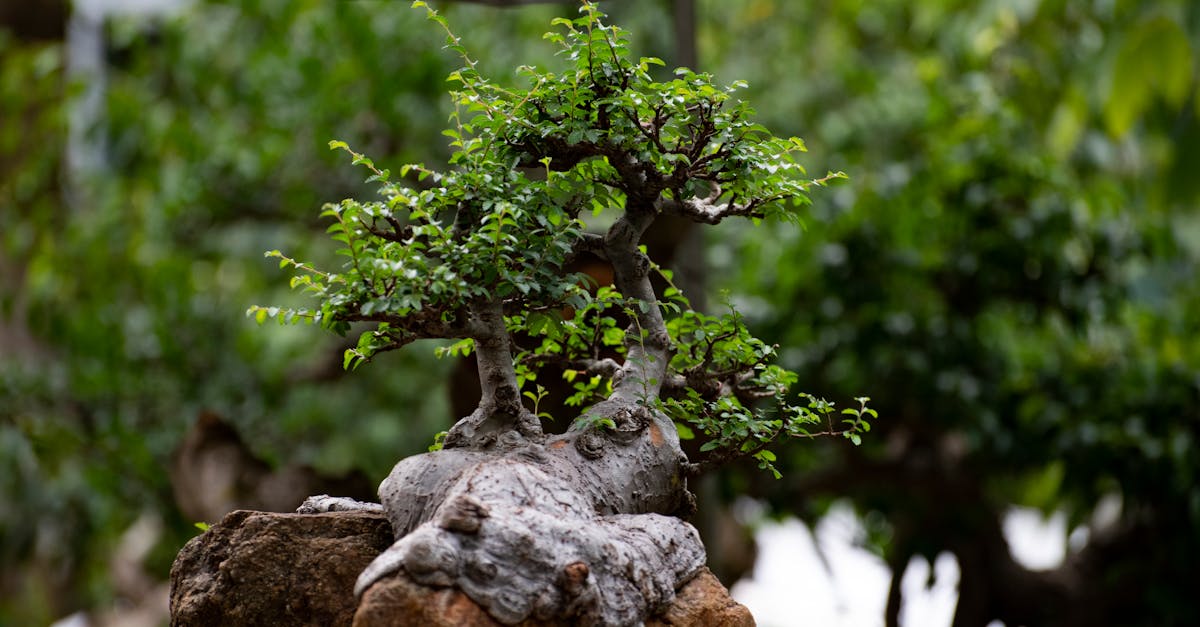
The Art of Miniature Sculpting: Shaping and Training Bonsai with Precision

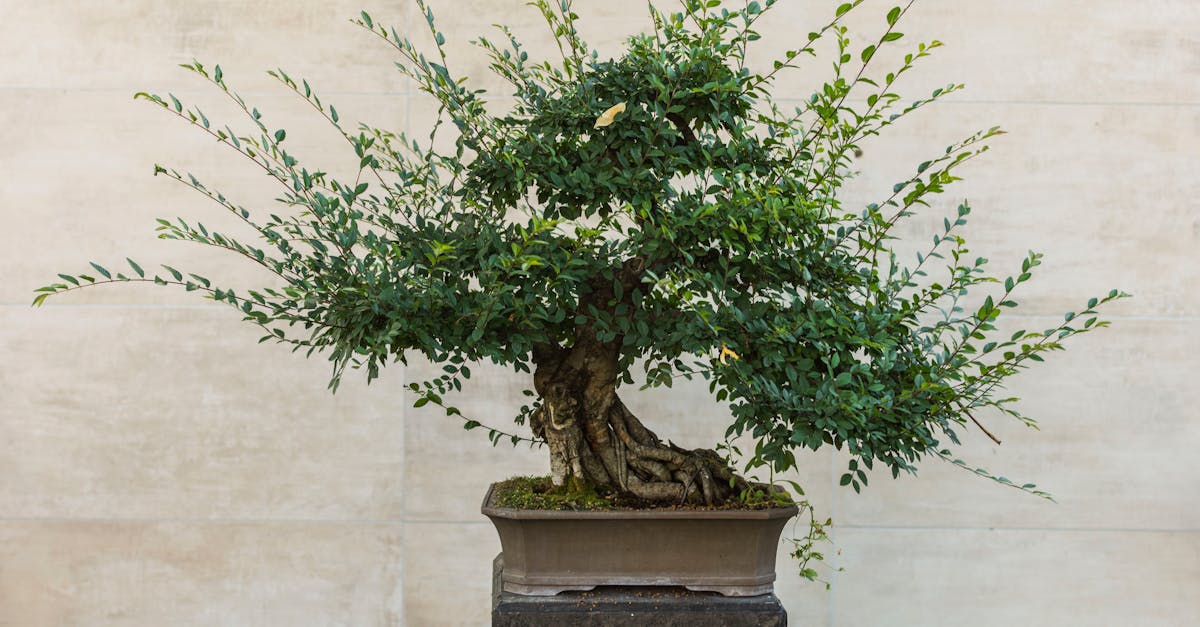
Bonsai, the ancient art of training miniature trees, has captivated enthusiasts for centuries. Wiring is an intricate technique that allows bonsai artists to shape and guide their creations, transforming them into living works of art. This comprehensive guide will provide a detailed exploration of wiring bonsai, from the essential materials and techniques to advanced concepts and maintenance practices. Whether you’re a novice or an experienced hobbyist, this article will empower you to harness the power of wiring and elevate your bonsai masterpieces to new heights.

Wiring offers a multitude of benefits for bonsai. It enables precise shaping of branches and trunks, creating graceful curves and desired angles. By controlling the growth direction, wiring promotes harmonious balance and enhances the overall aesthetic appeal of the tree. Additionally, it strengthens branches, preventing breakage and ensuring the long-term health and vitality of your bonsai.

As you embark on this artistic journey, remember that wiring bonsai is a delicate art that requires patience, precision, and a deep understanding of tree physiology. Embrace the learning process, experiment with different techniques, and observe the responses of your trees. With dedication and care, you’ll master the art of wiring and create miniature masterpieces that will bring joy and serenity to your life.

1. Introduction to Wiring Bonsai

Wiring bonsai is an ancient art that allows enthusiasts to shape and train miniature trees, creating living works of art. It plays a crucial role in enhancing the aesthetic value, promoting harmonious growth, and ensuring the long-term health of bonsai specimens. By carefully manipulating the branches and trunks with wire, bonsai artists can guide their trees into graceful curves, desired angles, and captivating shapes.

Wiring offers a multitude of benefits for bonsai cultivation. It enables precise shaping, allowing artists to create miniature landscapes and evoke a sense of age and maturity in their trees. By controlling the growth direction of branches, wiring promotes balance and symmetry, resulting in a visually pleasing composition. Additionally, it strengthens weaker branches, preventing breakage and ensuring the overall structural integrity of the tree.

Approaching wiring with a deep understanding of tree physiology is essential. Different species respond uniquely to wiring, and it’s crucial to consider factors such as branch thickness, flexibility, and growth patterns. By tailoring the wiring techniques to the specific needs of each tree, bonsai artists can achieve optimal results while preserving the health and vitality of their miniature masterpieces.

2. Materials and Techniques

When embarking on the art of wiring bonsai, having the right materials and mastering fundamental techniques are essential for success. The choice of wire plays a significant role, as different types and gauges are suited to varying tree sizes and species. Aluminum, copper, and stainless steel are commonly used wires in bonsai, each with its advantages and disadvantages.

Aluminum wire is lightweight, flexible, and easy to work with, making it a good choice for beginners. However, it is not as strong as other types of wire and can break easily if overtightened. Copper wire is stronger and more durable than aluminum, but it is also less flexible and can be more difficult to bend. Stainless steel wire is the strongest and most durable option, but it is also the most expensive and can be challenging to work with.

Once the appropriate wire is selected, fundamental wiring techniques ensure secure and effective shaping. Single wrapping, double wrapping, and serpentine wiring are commonly used methods, each serving specific purposes. Single wrapping involves wrapping the wire around a branch or trunk once, while double wrapping provides additional support and stability. Serpentine wiring is a more advanced technique that allows for gradual bending and shaping of branches, creating curves and movement.

Proper anchoring of the wire is crucial to prevent it from slipping or damaging the tree. Techniques such as the half-hitch and the clove hitch provide secure Befestigungsmöglichkeiten. Additionally, creating tension in the wire is essential for effective shaping, but it’s important to avoid overtightening, which can constrict the tree and hinder its growth.

Types of Wiring

In the art of bonsai wiring, selecting the appropriate type of wire is crucial for successful shaping and training. Aluminum, copper, and stainless steel are the most commonly used wires, each offering unique advantages and disadvantages.

Aluminum Wire: – Lightweight and flexible, making it easy to work with, especially for beginners. – Affordable and readily available. – Not as strong as other types of wire, can break easily if overtightened.

Copper Wire: – Stronger and more durable than aluminum, providing better support for branches. – Can be reused multiple times, making it a more economical option in the long run. – Less flexible than aluminum, can be more difficult to bend and shape.

Stainless Steel Wire: – Strongest and most durable option, ideal for shaping thicker branches and trunks. – Corrosion-resistant, ensuring longevity. – More expensive than aluminum and copper wires. – Can be challenging to work with due to its stiffness.

The choice of wire type ultimately depends on the size and species of the bonsai tree being wired. For smaller trees with delicate branches, aluminum wire may be sufficient. For larger trees or those with thicker trunks, copper or stainless steel wire is recommended for added strength and support.

Preparing the Tree for Wiring

Properly preparing a bonsai tree before wiring is essential to ensure its health and minimize stress. Here are the key steps involved:

Watering: Water the tree thoroughly a few days before wiring. This will help to make the branches more pliable and less likely to break when bent. Avoid overwatering, as soggy soil can damage the roots.

Defoliating: Remove all or most of the leaves from the tree. This will reduce transpiration and help the tree to focus its energy on recovering from the wiring process. Defoliation can also improve the visibility of the branches, making it easier to wire them effectively.

Removing Dead or Diseased Branches: Inspect the tree carefully and remove any dead or diseased branches. These branches are not only unsightly but can also provide entry points for pests and diseases. Pruning these branches will improve the overall health of the tree and allow you to focus on wiring the healthy branches.

By following these preparation steps, you can ensure that your bonsai tree is in optimal condition for wiring and is more likely to recover quickly and successfully.

3. Wiring Techniques

Wiring techniques play a crucial role in shaping and training bonsai trees. Here are step-by-step instructions for three common wiring techniques, with illustrations or diagrams for clarity:

Single Wrapping: 1. Position the wire at the base of the branch or trunk where you want to create a bend. 2. Wrap the wire around the branch once, making sure it is snug but not too tight. 3. Secure the wire by twisting the ends together or wrapping them around a nearby branch.

Double Wrapping: 1. Start by performing a single wrap as described above. 2. Bring the wire back over the branch and wrap it around a second time, crossing over the first wrap. 3. Secure the wire as before.

Serpentine Wiring: 1. This technique is used to create gradual bends and curves in branches. 2. Start by wrapping the wire around the base of the branch. 3. Instead of wrapping directly around the branch, bring the wire up and over the branch, then back down and around the other side. 4. Continue this serpentine pattern, gradually bending the branch as you wrap.

When wiring, it is important to use the appropriate gauge wire for the size of the branch and to avoid overtightening, which can damage the tree. With practice, you can master these wiring techniques and create beautiful and intricate bonsai specimens.

Basic Wiring Methods

As a beginner in bonsai wiring, mastering basic wiring methods is essential to ensure the health and well-being of your trees. Here are three fundamental techniques to get you started:

Anchoring the Wire: 1. Choose a branch or trunk where you want to create a bend or shape. 2. Position the wire at the base of the branch, close to the trunk. 3. Wrap the wire around the branch once or twice, making sure it is snug but not too tight. 4. Twist the ends of the wire together or wrap them around a nearby branch to secure it.

Creating Tension: 1. Once the wire is anchored, you can begin to create tension to bend the branch. 2. Hold the branch in one hand and pull the wire in the opposite direction with the other hand. 3. Gradually increase the tension until you achieve the desired bend or shape. 4. Avoid overtightening the wire, as this can damage the branch.

Avoiding Damage: 1. Use the appropriate gauge wire for the size of the branch you are wiring. 2. Avoid wiring branches that are too young or brittle. 3. Pad the wire with tape or rubber to prevent it from cutting into the bark. 4. Monitor the wired branches regularly and adjust the tension as needed.

By following these basic wiring methods, you can safely and effectively shape and train your bonsai trees.

Advanced Wiring Techniques

As you gain experience in bonsai wiring, you can explore advanced techniques to create more refined and artistic specimens. Here are three advanced wiring methods to enhance your bonsai skills:

Wiring for Specific Tree Styles: – Different bonsai styles, such as formal upright, informal upright, and cascade, have specific wiring requirements. – Study the characteristics of each style and adjust your wiring techniques accordingly. – For example, in a formal upright style, the trunk is typically straight and vertical, requiring careful wiring to create the desired shape.

Creating Movement and Flow: – Use wiring to create a sense of movement and flow in your bonsai trees. – By bending and shaping branches in different directions, you can mimic the natural growth patterns of trees in the wild. – This technique adds dynamism and interest to your bonsai compositions.

Enhancing the Illusion of Age: – Wiring can also be used to enhance the illusion of age in your bonsai trees. – By creating wrinkles and bends in the bark, you can give the impression that the tree has weathered many years of growth. – Use wire to shape branches in a way that mimics the natural aging process of trees.

4. Maintenance and Removal

Proper maintenance and timely removal of wire are crucial to ensure the continued health and aesthetic appeal of your wired bonsai trees. Here are three key guidelines to follow:

Monitoring Wired Bonsai: – Regularly inspect your wired bonsai trees to monitor their progress and make any necessary adjustments. – Check the tension of the wire and adjust it as the branches grow and change shape. – Look for signs of damage or constriction, and address them promptly.

Adjusting Tension: – As your bonsai tree grows, the tension of the wire will need to be adjusted to accommodate the changes in branch thickness and shape. – Use wire cutters to carefully loosen or tighten the wire as needed. – Avoid overtightening the wire, as this can damage the bark and restrict growth.

Removing the Wire: – Once the desired shape has been achieved, it is important to remove the wire at the appropriate time to avoid scarring or constriction. – Use wire cutters to carefully snip the wire, being cautious not to damage the bark. – Remove the wire completely and dispose of it properly.

By following these maintenance and removal guidelines, you can ensure that your wired bonsai trees remain healthy and continue to develop their desired shape and form.

Monitoring and Adjusting

Monitoring and adjusting the wiring of your bonsai tree is crucial to ensure its continued health and proper development. Here’s a comprehensive guide to help you with this important task:

Regular Inspection: Make it a habit to regularly inspect your wired bonsai tree, paying close attention to the areas where the wire is applied. Look for any signs of damage to the bark or branches, and check if the wire is still securely in place. If you notice any issues, address them promptly to prevent further damage.

Adjusting Tension: As your bonsai tree grows and changes shape, the tension of the wire may need to be adjusted to accommodate these changes. Use wire cutters to carefully loosen or tighten the wire as needed, ensuring that it is snug but not too tight. Overtightening the wire can restrict growth and damage the bark, so it’s important to find the right balance.

Maintaining Balance: Monitoring and adjusting the wiring also involves maintaining the overall balance and harmony of your bonsai tree. Observe the tree from different angles and make adjustments to the wire as necessary to create a visually pleasing composition. This may involve repositioning branches, adjusting the angle of bends, or removing unnecessary wire to enhance the tree’s natural beauty.

Removing the Wire

Removing the wire from your bonsai tree at the appropriate time is essential to minimize damage and promote the tree’s continued health and development. Here’s a detailed guide to help you with this important task:

Determining the Right Time: The optimal time to remove the wire depends on the species of your bonsai tree and the thickness of the branches that were wired. Generally, it’s best to wait until the branches have set in their new positions and are no longer actively growing. This can take several months or even years, depending on the tree and the extent of the wiring.

Safe Removal Techniques: When removing the wire, use sharp wire cutters to carefully snip it close to the trunk or branch. Avoid pulling or yanking the wire, as this can damage the bark and underlying tissues. Once the wire is cut, gently unwind it from the branch, taking care not to strip or tear the bark.

Protecting the Tree: After removing the wire, inspect the areas where it was applied for any signs of damage or indentation. You can use a sharp knife or scalpel to carefully remove any small pieces of wire that may have become embedded in the bark. Apply a sealant or wound paste to protect the exposed areas and promote healing.

5. Conclusion

In conclusion, the art of wiring bonsai is a rewarding and transformative practice that allows you to shape and train your miniature trees into exquisite works of art. By understanding the principles and techniques outlined in this article, you can harness the power of wiring to enhance the beauty, balance, and character of your bonsai specimens.

Remember that patience and care are essential when practicing this art. Observe your trees closely, adjust the wiring as needed, and remove it at the appropriate time to avoid damage. With dedication and a keen eye, you’ll master the techniques of wiring and create breathtaking bonsai masterpieces that will bring joy and serenity to your life.

If you’re seeking further knowledge and inspiration, here are some additional resources to explore: – Bonsai Wiring TechniquesWiring Bonsai TreesBonsai Wire

Embrace the art of wiring bonsai, and continue to refine your skills through practice and exploration. May your bonsai journey be filled with creativity, beauty, and the unwavering connection with nature that this ancient art form offers.

Q: Is wiring harmful to bonsai trees?

A: When performed correctly and with proper care, wiring is not harmful to bonsai trees. In fact, it can benefit the tree by guiding its growth and shaping its branches into desired positions. However, it’s important to use the appropriate wire gauge for the size of the branch and to avoid overtightening, which can damage the bark and restrict growth.

Q: How often should I inspect wired bonsai trees?

A: Regularly inspect your wired bonsai trees, especially during the initial stages of wiring. Monitor the tension of the wire and adjust it as the branches grow and change shape. Look for signs of damage or constriction, and address them promptly to ensure the tree’s health and proper development.

Q: What are some tips for removing wire from bonsai trees?

A: When removing wire, use sharp wire cutters to carefully snip it close to the trunk or branch. Avoid pulling or yanking the wire, as this can damage the bark and underlying tissues. Once the wire is cut, gently unwind it from the branch, taking care not to strip or tear the bark. After removing the wire, inspect the areas where it was applied for any signs of damage or indentation. You can use a sharp knife or scalpel to carefully remove any small pieces of wire that may have become embedded in the bark. Apply a sealant or wound paste to protect the exposed areas and promote healing.

Related Posts
Repotting Bonsai: A Comprehensive Guide to Nurture Healthy Growth

The Art of Bonsai Repotting: Nurturing Growth, Preserving Beauty Bonsai, the ancient art of cultivating miniature trees, requires meticulous care Read more

Fertilizing Bonsai: The Essential Guide to Keep Your Miniatures Thriving

The Art of Nourishing Miniature Masterpieces: A Comprehensive Guide to Bonsai Fertilization Fertilizing Bonsai: A Guide to Miniature Tree Maintenance Read more

7 Secret Tips for Growing a Thriving Bonsai Tree: Beginners Guide

Unveiling the Secrets: A Beginner's Journey into the Art of Bonsai Embark on the Enchanting Journey of Bonsai: A Beginner's Read more

Bonsai Watering 101: Everything You Need to Know

The Essential Guide to Bonsai Watering: Unlocking the Secrets of Miniature Tree Care Understanding the Art of Bonsai Watering: A Read more

Surface Roots in Bonsai: Techniques for Enhancing Aesthetics

The Art of Surface Roots: Unveiling the Hidden Beauty of Bonsai

Surface Roots in Bonsai: Unlocking Aesthetic Depth and Vitality

Surface roots in bonsai are not merely exposed roots; they are a testament to the delicate balance between nature and artistry. They add character, stability, and drainage to miniature trees, elevating them from mere replicas to living sculptures. In this comprehensive guide, we will delve into the world of surface roots, exploring techniques for their exposure, the benefits they offer, and the essential tools and materials for their care. Through a journey of gradual soil removal and precise root pruning, we will unveil the secrets of creating and maintaining surface roots that enhance the aesthetics and well-being of your bonsai.

Unearthing the beauty of surface roots is an art that requires patience, skill, and a deep understanding of the tree’s needs. By carefully following the techniques outlined in this guide, you can transform your bonsai into a breathtaking masterpiece that commands attention and admiration. As you expose the intricate network of roots that anchor your miniature tree, you will not only enhance its visual appeal but also promote its health and longevity.

1. Introduction to Surface Roots

Introduction to Surface Roots: Unveiling the Significance and Aesthetics of Exposed Roots in Bonsai

Surface roots, the exposed and visible roots of a bonsai tree, are not merely a result of erosion or neglect; they are a carefully crafted element that adds depth, character, and stability to miniature trees. In bonsai, the intentional exposure of surface roots is an art form that requires skill, patience, and a deep understanding of the tree’s needs.

The significance of surface roots in bonsai goes beyond aesthetics. They play a vital role in the tree’s health and well-being. Exposed roots provide additional anchorage, preventing the tree from toppling over, especially in shallow bonsai pots. They also improve drainage, reducing the risk of root rot and ensuring optimal aeration for healthy root growth. Furthermore, surface roots create a natural and visually appealing transition between the tree and its pot, enhancing the overall composition of the bonsai.

From a purely aesthetic standpoint, surface roots add a sense of age and maturity to bonsai trees. They mimic the appearance of trees in nature, where exposed roots are often found in harsh environments such as rocky outcrops or near water bodies. By exposing surface roots, bonsai artists can create the illusion of an ancient tree in miniature, adding depth and character to their compositions. The intricate patterns and textures of exposed roots also provide visual interest, drawing the viewer’s attention to the intricate details of the bonsai.

2. Techniques for Exposing Surface Roots

Techniques for Exposing Surface Roots: A Step-by-Step Guide to Safe and Effective Root Exposure

Exposing surface roots in bonsai is a delicate process that requires patience, precision, and a deep understanding of the tree’s needs. The following step-by-step techniques will guide you through the process of safely and effectively exposing surface roots, enhancing the stability, drainage, and visual appeal of your bonsai.

Gradual Soil Removal: 1. Begin by carefully removing the bonsai from its pot. Use a chopstick or a small tool to gently loosen the soil around the base of the tree, taking care not to damage the roots. 2. Gradually remove the soil, layer by layer, exposing the surface roots bit by bit. Avoid using excessive force or pulling on the roots, as this can damage them. 3. Once the desired level of root exposure is achieved, use a fine brush or compressed air to remove any remaining soil particles from the exposed roots.

Proper Root Pruning: 1. Once the surface roots are exposed, carefully inspect them for any damaged or diseased roots. Use sharp, sterilized pruning shears to remove any unhealthy roots, cutting them cleanly at a 45-degree angle. 2. To enhance the visual appeal of the surface roots, use a root hook or tweezers to gently tease out individual roots and arrange them in a pleasing composition. 3. Avoid over-pruning the roots, as this can weaken the tree. Only prune what is necessary to remove damaged roots or improve the overall appearance of the exposed roots.

Gradual Soil Removal

Gradual Soil Removal: A Step-by-Step Guide to Exposing Surface Roots Safely

Gradual soil removal is a crucial technique in exposing surface roots in bonsai while minimizing damage to the tree. It involves carefully removing the soil around the base of the tree, layer by layer, to gradually reveal the surface roots. Here’s a step-by-step guide to help you perform this technique safely and effectively:

  1. Preparation: Before removing any soil, water the bonsai thoroughly to loosen the soil and make it easier to work with. Use a chopstick or a small tool to gently loosen the soil around the base of the tree, taking care not to damage the roots.
  2. Gradual Removal: Begin by removing the top layer of soil, exposing the uppermost surface roots. Use a soft brush or compressed air to remove any loose soil particles from the exposed roots. Continue removing the soil in thin layers, gradually exposing more of the surface roots. Avoid using excessive force or pulling on the roots, as this can damage them.
  3. Inspecting Roots: As you expose the surface roots, carefully inspect them for any signs of damage or disease. If you find any damaged or diseased roots, use sharp, sterilized pruning shears to remove them cleanly at a 45-degree angle. Once the desired level of root exposure is achieved, use a fine brush or compressed air to remove any remaining soil particles from the exposed roots.

Proper Root Pruning

Proper Root Pruning: A Guide to Enhancing Root Appearance and Promoting Healthy Growth

Proper root pruning is essential for enhancing the appearance and promoting the healthy growth of surface roots in bonsai. It involves carefully removing damaged or diseased roots, as well as shaping and arranging the remaining roots to create a visually appealing and structurally sound root system.

To prune roots properly, follow these steps: 1. Inspect the Roots: Once the surface roots are exposed, carefully inspect them for any signs of damage or disease. Damaged roots may appear discolored, soft, or brittle, while diseased roots may have lesions or discoloration. Use sharp, sterilized pruning shears to remove any damaged or diseased roots cleanly at a 45-degree angle. 2. Shaping the Roots: Once the damaged or diseased roots have been removed, you can begin shaping the remaining roots to enhance their appearance. Use a root hook or tweezers to gently tease out individual roots and arrange them in a pleasing composition. You can create curves, bends, and other natural-looking shapes to add character and interest to the exposed roots. 3. Final Touches: After shaping the roots, use a fine brush or compressed air to remove any loose soil particles or debris from the exposed roots. You can also apply a thin layer of root stimulator or fertilizer to promote healthy root growth.

3. Benefits of Surface Roots

Benefits of Surface Roots: Unlocking the Advantages of Exposed Roots in Bonsai

Surface roots, when properly exposed and maintained, offer numerous benefits to bonsai trees, enhancing their stability, drainage, and visual appeal. Here’s a closer look at these advantages:

Increased Stability: Surface roots provide additional anchorage for bonsai trees, preventing them from toppling over, especially in shallow pots. The exposed roots spread out and grip the soil, creating a wider and more stable base for the tree. This is particularly important for trees with a large canopy or those that are prone to strong winds.

Improved Drainage: Surface roots aid in draining excess water from the soil, reducing the risk of root rot and ensuring optimal aeration for healthy root growth. When water is applied to the bonsai, it can easily drain through the exposed roots and escape from the pot, preventing waterlogging and creating a healthier environment for the tree’s roots.

Enhanced Visual Appeal: Surface roots add a unique and visually appealing element to bonsai trees. They mimic the appearance of trees in nature, where exposed roots are often found in harsh environments such as rocky outcrops or near water bodies. By exposing surface roots, bonsai artists can create the illusion of an ancient tree in miniature, adding depth and character to their compositions. The intricate patterns and textures of exposed roots also provide visual interest, drawing the viewer’s attention to the intricate details of the bonsai.

Increased Stability

Increased Stability: Unlocking the Role of Surface Roots in Anchoring Bonsai Trees

Surface roots play a crucial role in providing additional anchorage and stability to miniature bonsai trees. Unlike trees in nature that have a vast root system hidden underground, bonsai trees are often grown in shallow pots with limited soil volume. This can make them more prone to toppling over, especially in windy conditions or when the soil is wet and loose.

Surface roots help to mitigate this issue by spreading out and gripping the soil, creating a wider and more stable base for the tree. They act like anchors, preventing the tree from moving or falling over. This is particularly important for trees with a large canopy or those that are top-heavy. By exposing and maintaining surface roots, bonsai artists can ensure that their trees remain upright and stable, even in challenging conditions.

Furthermore, surface roots help to distribute the weight of the tree more evenly, reducing the stress on the trunk and preventing it from bending or breaking. This is especially important for trees that are being trained into unusual or contorted shapes, as they may have an uneven weight distribution. By providing additional support and stability, surface roots help to ensure the long-term health and well-being of bonsai trees.

Improved Drainage

Improved Drainage: Unveiling the Role of Surface Roots in Water Management

Proper drainage is essential for the health of bonsai trees, as waterlogging can lead to root rot and other problems. Surface roots play a vital role in improving drainage by providing additional pathways for excess water to escape from the soil.

When water is applied to a bonsai tree, it can easily drain through the exposed surface roots and escape from the pot. This prevents the soil from becoming waterlogged and creates a healthier environment for the tree’s roots. Good drainage allows air to circulate around the roots, providing them with the oxygen they need to function properly.

Furthermore, surface roots help to break up compacted soil, creating more pore space for water to drain. This is especially important for bonsai trees that are grown in shallow pots, where soil compaction can be a problem. By improving drainage and aeration, surface roots help to prevent root rot and promote healthy root growth, which is essential for the overall health and vitality of bonsai trees.

Enhanced Visual Appeal

Enhanced Visual Appeal: Exploring the Aestheticの魅力 of Surface Roots in Bonsai

Surface roots are not merely functional elements in bonsai; they also add a unique and visually appealing element to these miniature works of art. The exposed roots mimic the appearance of trees in nature, where surface roots are often found in harsh environments such as rocky outcrops or near water bodies. By exposing surface roots, bonsai artists can create the illusion of an ancient tree in miniature, adding depth and character to their compositions.

The intricate patterns and textures of surface roots provide visual interest, drawing the viewer’s attention to the intricate details of the bonsai. The exposed roots can be arranged in a variety of ways to create different effects. They can be spread out to create a sense of stability and maturity, or they can be intertwined to create a more dynamic and visually interesting composition.

Furthermore, surface roots can be used to create a sense of movement and flow in a bonsai composition. By arranging the roots in a particular direction, bonsai artists can guide the viewer’s eye through the composition and create a sense of depth and perspective. The exposed roots can also be used to create a connection between the tree and its pot, enhancing the overall harmony and balance of the composition.

4. Tools and Materials

Tools and Materials: A Guide to the Essentials for Surface Root Care in Bonsai

Safely exposing and maintaining surface roots in bonsai requires the use of appropriate tools and materials. Having the right equipment will ensure that the process is carried out effectively, minimizing damage to the tree and promoting healthy root growth.

Essential Tools: 1. Root Hook: A root hook is a specialized tool designed for carefully teasing out and manipulating surface roots. It features a sharp, curved hook at one end and a handle at the other. The hook allows for precise control and gentle removal of soil from around the roots, minimizing damage. 2. Tweezers: Tweezers are useful for handling individual roots, especially when shaping or arranging them. They provide a delicate grip and allow for precise placement of roots. 3. Sharp Knife or Scissors: A sharp knife or a pair of small scissors is necessary for pruning roots. The刀片 should be sharp to ensure clean cuts and prevent tearing or damaging the roots.

Suitable Materials: 1. Bonsai Soil: Bonsai soil is a specialized growing medium that is well-draining and allows for proper aeration. It is essential for providing optimal conditions for surface root growth. 2. Organic Fertilizer: Organic fertilizer provides nutrients for the tree and helps promote healthy root growth. It should be applied sparingly to avoid over-fertilizing. 3. Root Stimulator: A root stimulator can be used to encourage root growth and development, particularly after root pruning or when the tree is under stress.

Essential Tools

Essential Tools: Unveiling the Tools for Precision Root Work in Bonsai

Exposing and maintaining surface roots in bonsai requires a specialized set of tools that allow for precise and delicate work. These tools are designed to minimize damage to the roots and promote healthy root growth.

Root Hook: The root hook is a must-have tool for surface root work. It features a sharp, curved hook at one end and a handle at the other. The hook is used to gently tease out and manipulate surface roots, removing soil and exposing them without causing damage. The curved shape of the hook allows for precise control and easy access to roots in tight spaces.

Tweezers: Tweezers are another essential tool for bonsai root work. They are used for handling individual roots, especially when shaping or arranging them. Tweezers provide a delicate grip and allow for precise placement of roots, ensuring a natural and aesthetically pleasing appearance.

Sharp Knife or Scissors: A sharp knife or a pair of small, sharp scissors is necessary for pruning roots. The blade should be sharp to ensure clean cuts and prevent tearing or damaging the roots. Pruning roots is essential for removing damaged or diseased roots and shaping the overall root structure.

Suitable Materials

Suitable Materials: Selecting the Right Soil and Fertilizers for Surface Root Health

The choice of soil and fertilizers plays a crucial role in ensuring optimal growth and health for bonsai with surface roots. The right materials provide essential nutrients and promote a well-draining environment, which is critical for surface root development.

Bonsai Soil: Bonsai soil is a specialized growing medium specifically designed for bonsai trees. It is well-draining and allows for proper aeration, which is essential for surface roots to thrive. Bonsai soil typically consists of a mix of inorganic materials such as akadama, pumice, and lava rock, which provide good drainage and prevent waterlogging. Organic materials such as peat moss or compost may also be added to provide nutrients and improve water retention.

Organic Fertilizer: Organic fertilizers are recommended for bonsai with surface roots as they provide a slow and steady release of nutrients. This is important because surface roots are more prone to nutrient burn than roots that are buried in the soil. Organic fertilizers such as fish emulsion, bone meal, or manure can be applied sparingly to provide essential nutrients for healthy root growth.

5. Conclusion

Conclusion: Unveiling the Significance of Surface Roots in Bonsai

Surface roots, when properly exposed and maintained, add a unique aesthetic appeal to bonsai trees and provide numerous benefits that contribute to their health and longevity. They enhance the stability of the tree, improve drainage, and create a natural and visually interesting element that mimics the appearance of trees in nature.

Creating and maintaining surface roots in bonsai requires patience, skill, and a deep understanding of the tree’s needs. By following the techniques outlined in this guide, bonsai enthusiasts can safely expose surface roots, prune them to enhance their appearance, and provide the necessary care to ensure their continued health. Proper soil selection, fertilization, and regular monitoring are essential for the long-term success of surface roots in bonsai.

Incorporating surface roots into bonsai compositions is an art form that adds depth, character, and a touch of the natural world to these miniature masterpieces. By embracing the techniques and principles discussed in this guide, bonsai artists can unlock the full potential of surface roots, creating visually stunning and healthy bonsai trees that will be cherished for generations to come.

Why are surface roots important in bonsai?

Surface roots provide additional stability to the tree, preventing it from toppling over, especially in shallow bonsai pots. They also improve drainage, reducing the risk of root rot and ensuring optimal aeration for healthy root growth. Additionally, surface roots add a unique aesthetic appeal to bonsai trees, mimicking the appearance of trees in nature and adding depth and character to the composition.

How do I safely expose surface roots in my bonsai tree?

To safely expose surface roots, gradually remove the soil around the base of the tree, layer by layer, using a chopstick or a small tool to loosen the soil without damaging the roots. Once the desired level of root exposure is achieved, use a fine brush or compressed air to remove any remaining soil particles from the exposed roots.

How do I properly prune surface roots?

To properly prune surface roots, carefully inspect them for any damaged or diseased roots. Remove any unhealthy roots using sharp, sterilized pruning shears, cutting them cleanly at a 45-degree angle. To enhance the visual appeal of the surface roots, use a root hook or tweezers to gently tease out individual roots and arrange them in a pleasing composition.

What type of soil is best for bonsai trees with surface roots?

Bonsai soil is a specialized growing medium that is well-draining and allows for proper aeration, which is essential for surface root development. Bonsai soil typically consists of a mix of inorganic materials such as akadama, pumice, and lava rock, which provide good drainage and prevent waterlogging.

How often should I fertilize my bonsai tree with surface roots?

Fertilize your bonsai tree with surface roots sparingly, following the instructions on the fertilizer label. Organic fertilizers are recommended as they provide a slow and steady release of nutrients, which is less likely to burn the surface roots.

Related Posts
Repotting Bonsai: A Comprehensive Guide to Nurture Healthy Growth

The Art of Bonsai Repotting: Nurturing Growth, Preserving Beauty Bonsai, the ancient art of cultivating miniature trees, requires meticulous care Read more

Fertilizing Bonsai: The Essential Guide to Keep Your Miniatures Thriving

The Art of Nourishing Miniature Masterpieces: A Comprehensive Guide to Bonsai Fertilization Fertilizing Bonsai: A Guide to Miniature Tree Maintenance Read more

7 Secret Tips for Growing a Thriving Bonsai Tree: Beginners Guide

Unveiling the Secrets: A Beginner's Journey into the Art of Bonsai Embark on the Enchanting Journey of Bonsai: A Beginner's Read more

Bonsai Watering 101: Everything You Need to Know

The Essential Guide to Bonsai Watering: Unlocking the Secrets of Miniature Tree Care Understanding the Art of Bonsai Watering: A Read more

Deadwood in Bonsai: A Visual Guide to Adding Character and Age

The Alchemy of Age: Exploring the Aesthetic and Practical Benefits of Deadwood in Bonsai

Unveiling the Enigmatic Beauty of Deadwood in Bonsai: A Journey into Artistic Naturalism

Bonsai, the ancient art of cultivating miniature trees in shallow pots, has captivated enthusiasts for centuries. Beyond its meticulous shaping and pruning, one of the most captivating elements of bonsai is the incorporation of deadwood. Deadwood refers to the exposed, non-living parts of the tree, adding a sense of age, character, and artistic depth to these living masterpieces.

This comprehensive guide will delve into the fascinating world of deadwood in bonsai. We will explore its aesthetic appeal, practical benefits, and the techniques used to create realistic deadwood effects. Discover the diverse styles of deadwood, ranging from the striking jin to the enigmatic uro. Learn the proper care and maintenance techniques to preserve the longevity and beauty of deadwood in your bonsai creations. Embrace the art of deadwood in bonsai and transform ordinary trees into extraordinary works of living art.

1. Introduction to Deadwood in Bonsai

Introduction to Deadwood in Bonsai: Gain a fundamental understanding of deadwood in bonsai, its aesthetic appeal, and the reasons why enthusiasts incorporate deadwood into their miniature landscapes.

In the realm of bonsai, the art of cultivating miniature trees in shallow pots, deadwood holds a captivating allure. It refers to the exposed, non-living parts of the tree, adding a sense of age, character, and artistic depth to these living masterpieces. Incorporating deadwood into bonsai is not merely an aesthetic choice; it also offers practical benefits, such as improved drainage and aeration.

The aesthetic appeal of deadwood in bonsai lies in its ability to mimic the natural aging process of trees. Deadwood adds character and a sense of maturity to bonsai, making them appear as if they have weathered the storms of time. It creates visual interest and depth, drawing the viewer’s eye to the intricate details and textures of the deadwood. Moreover, deadwood can be used to create unique and eye-catching compositions, giving each bonsai its own distinct personality.

The Aesthetics of Deadwood

The Aesthetics of Deadwood: Discover how deadwood adds character, age, and visual interest to bonsai, enhancing their artistic value and resemblance to mature trees in nature.

In bonsai, deadwood is not merely a lifeless element; it is an integral part of the composition, imbued with aesthetic significance. Deadwood adds character and a sense of maturity to bonsai, making them appear as if they have weathered the storms of time. It creates visual interest and depth, drawing the viewer’s eye to the intricate details and textures of the deadwood. The presence of deadwood adds a touch of realism, enhancing the resemblance of bonsai to their full-sized counterparts in nature.

Deadwood can be used to create a variety of visual effects in bonsai. For instance, it can be used to create the illusion of a hollowed-out trunk, adding depth and intrigue to the composition. It can also be used to represent broken branches or scars, giving the bonsai a sense of history and character. Additionally, deadwood can be used to create contrast with the living parts of the bonsai, highlighting the delicate balance between life and death.

Benefits of Incorporating Deadwood

Benefits of Incorporating Deadwood: Explore the practical benefits of using deadwood in bonsai, including improved drainage, aeration, and the creation of unique and eye-catching compositions.

In addition to its aesthetic appeal, deadwood also offers several practical benefits for bonsai. One of the main benefits is improved drainage. Deadwood allows excess water to drain away more easily, preventing the roots from becoming waterlogged and rotting. This is especially important for bonsai, as they are often grown in shallow pots with limited drainage holes.

Another benefit of deadwood is that it improves aeration. The porous nature of deadwood allows air to circulate around the roots, promoting healthy root growth and preventing root rot. Additionally, deadwood can be used to create unique and eye-catching compositions. By incorporating deadwood into the design of the bonsai, you can create a more dynamic and visually interesting composition. Deadwood can be used to create the illusion of depth, add contrast, and highlight the beauty of the living parts of the bonsai.

2. Creating Deadwood Effects

Creating Deadwood Effects: Learn the different techniques used to create realistic deadwood effects on bonsai trees, including carving, scraping, and wiring.

Creating realistic deadwood effects on bonsai trees is an art form that requires patience and skill. There are several different techniques that can be used to achieve the desired effect, including carving, scraping, and wiring.

Carving is a technique that involves using a sharp knife or chisel to remove bark and wood from the trunk or branches of the bonsai. This can be used to create a variety of effects, such as hollowed-out trunks, broken branches, and scars. Scraping is a gentler technique that involves using a wire brush or other abrasive tool to remove the surface layer of bark. This can be used to create a more natural-looking deadwood effect, as it preserves the grain and texture of the wood.

Wiring is a technique that involves using wire to shape and position deadwood branches. This can be used to create dynamic and visually interesting compositions. By combining these techniques, it is possible to create realistic and visually appealing deadwood effects on bonsai trees.

Carving Techniques

Carving Techniques: Discover the art of carving deadwood to achieve various shapes and textures, adding depth and character to your bonsai.

Carving is a technique that involves using a sharp knife or chisel to remove bark and wood from the trunk or branches of the bonsai. This can be used to create a variety of effects, such as hollowed-out trunks, broken branches, and scars. Carving is a versatile technique that allows for a great deal of creativity and artistic expression. It can be used to create both realistic and stylized deadwood effects, depending on the desired outcome.

When carving deadwood, it is important to use sharp tools and to take your time. It is also important to have a clear idea of the desired effect before you begin carving. This will help you to avoid making mistakes and to achieve the desired result. With practice, you will be able to master the art of carving deadwood and create realistic and visually appealing effects on your bonsai trees.

Scraping Techniques

Scraping Techniques: Explore the use of scraping tools to remove bark and create natural-looking deadwood surfaces, enhancing the realism of your bonsai.

Scraping is a technique that involves using a wire brush or other abrasive tool to remove the surface layer of bark from the trunk or branches of the bonsai. This can be used to create a more natural-looking deadwood effect, as it preserves the grain and texture of the wood. Scraping is a less invasive technique than carving, and it is therefore less likely to damage the bonsai tree.

When scraping deadwood, it is important to use a sharp tool and to take your time. It is also important to have a clear idea of the desired effect before you begin scraping. This will help you to avoid making mistakes and to achieve the desired result. With practice, you will be able to master the art of scraping deadwood and create realistic and visually appealing effects on your bonsai trees.

Wiring Techniques

Wiring Techniques: Learn how to use wire to shape and position deadwood branches, creating dynamic and visually appealing compositions.

Wiring is a technique that involves using wire to shape and position deadwood branches. This can be used to create dynamic and visually interesting compositions. Wiring is a versatile technique that can be used to create a variety of effects, from subtle curves to dramatic bends. It is important to use the correct gauge of wire for the size of the branch you are wiring. If the wire is too thin, it will not be able to hold the branch in place. If the wire is too thick, it can damage the branch.

When wiring deadwood, it is important to take your time and to be careful not to damage the branch. It is also important to have a clear idea of the desired effect before you begin wiring. This will help you to avoid making mistakes and to achieve the desired result. With practice, you will be able to master the art of wiring deadwood and create beautiful and visually appealing compositions.

3. Styles of Deadwood in Bonsai

Styles of Deadwood in Bonsai: Discover the diverse styles of deadwood commonly used in bonsai, each adding a unique character and artistic expression to the composition.

There are many different styles of deadwood that can be used in bonsai. Each style has its own unique character and artistic expression. Some of the most common styles of deadwood include:

  • Jin: Jin refers to deadwood that extends from the trunk or branches of the bonsai. It is often used to create a sense of age and maturity. Jin can be created by carving away the bark and wood from a branch, or by allowing a branch to die naturally.

  • Shari: Shari refers to the exposed inner wood of the trunk or branches of the bonsai. It is often used to create a sense of depth and character. Shari can be created by removing the bark from the trunk or branches, or by allowing the bark to peel away naturally.

  • Uro: Uro refers to hollowed-out sections of the trunk or branches of the bonsai. It is often used to create a sense of mystery and intrigue. Uro can be created by carving out a section of the trunk or branches, or by allowing a section to rot naturally.

Jin

Jin: Explore the concept of jin, where deadwood extends from the trunk or branches, creating a striking visual element.

Jin is a style of deadwood that extends from the trunk or branches of a bonsai tree. It is often used to create a sense of age and maturity. Jin can be created by carving away the bark and wood from a branch, or by allowing a branch to die naturally. The resulting deadwood is then left exposed, creating a striking visual element. Many different, styles of jin. Here are a few of the most common:

  • Standing jin: A standing jin is a deadwood branch that extends vertically from the trunk or another branch.

  • Reclining jin: A reclining jin is a deadwood branch that extends horizontally from the trunk or another branch.

  • Windswept jin: A windswept jin is a deadwood branch that has been shaped by the wind. Windswept jin often have a curved or twisted appearance.

  • Shari jin: A shari jin is a deadwood branch that has been partially exposed, revealing the inner wood of the tree.

Shari

Shari: Learn about shari, the technique of exposing the inner wood of the trunk or branches, adding a sense of age and maturity to the bonsai.

Shari is a style of deadwood that involves exposing the inner wood of the trunk or branches of a bonsai tree. It is often used to create a sense of age and maturity. The Japanese word “shari” means “to peel away” or “to expose.” Shari can be created by removing the bark from the trunk or branches of the tree using specialized carving tools or a wire brush. Once created, shari will gradually weather and take on a silvery-gray patina, giving the bonsai a sense of age and character.

There are many different types of shari, each with its own unique appearance. Some of the most common types of shari include:

  • Jin shari: Jin shari is a type of shari that extends from the trunk or branches of the tree. It is similar to jin, but instead of extending beyond the tree, it is exposed on the tree.

  • Uro shari: Uro shari is a type of shari that is created by hollowing out a section of the trunk or branches of the tree. This creates a dramatic visual effect and can add a sense of mystery and intrigue to the bonsai.

  • Sabamiki shari: Sabamiki shari is a type of shari that is created by peeling away the bark from the trunk of the tree, revealing thin strips of inner wood. This creates a unique and visually striking effect.

Uro

Uro: Discover uro, a style where hollowed-out sections of the trunk or branches are created, adding depth and intrigue to the bonsai.

Uro is a style of deadwood that involves hollowing out sections of the trunk or branches of a bonsai tree. The resulting hollowed-out sections add depth and intrigue to the bonsai and can create a sense of age and maturity. The Japanese word “uro” means “cavity” or “hollow,” and uro is often used to create the illusion of a tree that has been weathered and hollowed out by the forces of nature.

There are many different ways to create uro. One common method is to use a carving tool to carefully hollow out a section of the trunk or branches. Another method is to use a wire brush to remove the bark and wood from a section of the trunk or branches, leaving behind a hollowed-out cavity. Uro can be created in a variety of shapes and sizes. Some of the most common types of uro include:

  • Hollow trunk uro: Hollow trunk uro is a type of uro that is created by hollowing out a section of the trunk of the tree. This creates a dramatic visual effect and can add a sense of age and maturity to the bonsai.

  • Branch uro: Branch uro is a type of uro that is created by hollowing out a section of a branch. This can create a more subtle and delicate effect than hollow trunk uro.

  • Multiple uro: Multiple uro is a type of uro that is created by hollowing out multiple sections of the trunk or branches. This can create a complex and visually interesting effect.

4. Maintaining Deadwood in Bonsai

Maintaining Deadwood in Bonsai: Gain insights into the proper care and maintenance of deadwood in bonsai, ensuring its longevity and aesthetic appeal.

Maintaining deadwood in bonsai is essential to ensure its longevity and aesthetic appeal. Deadwood is a natural part of the aging process of trees, and it can add character and interest to a bonsai. However, if deadwood is not properly cared for, it can become brittle and break, or it can attract pests and diseases.

Here are some tips for maintaining deadwood in bonsai:

  • Prevent decay: Deadwood is susceptible to decay, so it is important to take steps to prevent it. One way to do this is to apply a sealant to the deadwood. Sealants help to protect the deadwood from moisture and pests. You can easily make your own natural sealant, known as jin yaki, by mixing water and rice flour or wood glue and water. You may also opt for commercial sealants available in the market.

  • Protect from pests and diseases: Deadwood can also be susceptible to pests and diseases, so it is important to take steps to protect it. One way to do this is to keep the bonsai in a clean and dry environment. You should also regularly inspect the bonsai for pests and diseases, and take appropriate action if you find any.

Preventing Decay

Preventing Decay: Learn techniques to prevent decay and preserve the deadwood’s natural appearance, ensuring the long-term health of your bonsai.

Decay is one of the biggest threats to deadwood in bonsai. Decay is caused by fungi and bacteria that break down the wood, causing it to become soft and brittle. If left untreated, decay can eventually destroy the deadwood and even the entire bonsai.

There are a number of things that can be done to prevent decay in deadwood. One of the most important is to keep the deadwood dry since moisture promotes the growth of fungi and bacteria. This can be done by storing the bonsai in a dry place and by avoiding overwatering. Another important step is to remove any dead or diseased wood. Dead and diseased wood is more susceptible to decay, and removing it will help to prevent the spread of decay to healthy wood.

In addition to these preventive measures, there are a number of treatments that can be used to protect deadwood from decay. One common treatment is to apply a sealant to the deadwood. Sealants help to protect the deadwood from moisture and pests. Commercial sealants are available in the market, and you may also make your own natural sealant, known as jin yaki, by mixing water and rice flour or wood glue and water.

Protecting from Pests and Diseases

Protecting from Pests and Diseases: Discover methods to protect deadwood from pests and diseases, maintaining the integrity and beauty of your bonsai creation.

Pests and diseases can be a serious threat to the health of your bonsai, and deadwood is particularly susceptible to attack. Pests such as wood-boring beetles and termites can tunnel into the deadwood, causing it to become weak and brittle. Diseases such as fungi and bacteria can also cause deadwood to decay.

There are a number of things that can be done to protect deadwood from pests and diseases. One of the most important is to keep the bonsai in a clean and dry environment. Pests and diseases are more likely to thrive in damp, humid conditions. It may seem counterintuitive given how we typically water and care for bonsai, but deadwood generally does not need to be watered and should be kept as dry as possible.

Another important step is to regularly inspect the bonsai for pests and diseases. If you find any pests or diseases, take appropriate action to remove them. This may involve using pesticides or fungicides, or it may simply involve removing the affected wood.

5. Conclusion

Conclusion: Summarize the key points discussed throughout the guide, reinforcing the importance of deadwood in bonsai and providing a comprehensive understanding of its application.

Deadwood is an essential element of bonsai, adding character, age, and visual interest to these miniature trees. Creating realistic deadwood effects requires patience and skill, but it is a rewarding process that can transform an ordinary bonsai into a work of art. In this guide, we have explored the different techniques used to create deadwood effects, as well as the importance of maintaining deadwood to ensure its longevity and aesthetic appeal.

Deadwood can be used to create a variety of effects in bonsai, from simple jin to complex uro. The style of deadwood that you choose will depend on the overall design of the bonsai and the desired effect. It is important to take your time and plan carefully before creating deadwood effects, as mistakes can be difficult to correct. However, deadwood is a versatile material, and with practice, you will be able to create beautiful and realistic effects that will add depth and character to your bonsai creations.

The Art of Deadwood in Bonsai

The Art of Deadwood in Bonsai: Conclude by highlighting the artistic and aesthetic value of deadwood in bonsai, emphasizing its ability to transform ordinary trees into living masterpieces.

Deadwood is an essential element of bonsai, adding character, age, and visual interest to these miniature trees. It is a versatile material that can be used to create a variety of effects, from simple jin to complex uro. The style of deadwood that you choose will depend on the overall design of the bonsai and the desired effect. However, regardless of the style, deadwood always adds a touch of artistry and natural beauty to bonsai.

In the hands of a skilled artist, deadwood can transform an ordinary tree into a living masterpiece. Deadwood can be used to create the illusion of age and maturity, or it can be used to add a sense of drama and excitement to a composition. It can also be used to create a sense of depth and perspective, drawing the viewer’s eye into the bonsai and inviting them to explore its intricate details.

Further Exploration

Further Exploration: Encourage readers to continue exploring the fascinating world of deadwood in bonsai, inspiring them to create their own unique and captivating miniature landscapes.

The world of deadwood in bonsai is vast and ever-changing. There is always something new to learn, and there are always new techniques to master. If you are interested in learning more about deadwood in bonsai, there are a number of resources available to you.

You can find books, articles, and videos on the topic, and you can also attend workshops and classes. There are also a number of online forums where you can connect with other bonsai enthusiasts and learn from their experiences. Bonsai clubs, local nurseries, and botanical gardens that specialize in bonsai are also great places to learn more about the art of deadwood in bonsai.

The best way to learn about deadwood in bonsai is to practice. Experiment with different techniques and see what works for you. Don’t be afraid to make mistakes. Mistakes are a natural part of the learning process. The more you practice, the more confident you will become in your ability to create beautiful and realistic deadwood effects.

What are the benefits of using deadwood in bonsai?

Deadwood adds character, age, and visual interest to bonsai. It can also improve drainage and aeration, and it can be used to create unique and eye-catching compositions.

What are the different techniques used to create deadwood effects?

The different techniques used to create deadwood effects include carving, scraping, and wiring.

How can I prevent decay in deadwood?

You can prevent decay in deadwood by keeping it dry and by applying a sealant.

How can I protect deadwood from pests and diseases?

You can protect deadwood from pests and diseases by keeping it clean and dry, and by regularly inspecting it for pests and diseases.

Where can I learn more about deadwood in bonsai?

You can learn more about deadwood in bonsai by reading books, articles, and videos on the topic. You can also attend workshops and classes, and you can visit online forums and bonsai clubs.

Related Posts
Repotting Bonsai: A Comprehensive Guide to Nurture Healthy Growth

The Art of Bonsai Repotting: Nurturing Growth, Preserving Beauty Bonsai, the ancient art of cultivating miniature trees, requires meticulous care Read more

Fertilizing Bonsai: The Essential Guide to Keep Your Miniatures Thriving

The Art of Nourishing Miniature Masterpieces: A Comprehensive Guide to Bonsai Fertilization Fertilizing Bonsai: A Guide to Miniature Tree Maintenance Read more

7 Secret Tips for Growing a Thriving Bonsai Tree: Beginners Guide

Unveiling the Secrets: A Beginner's Journey into the Art of Bonsai Embark on the Enchanting Journey of Bonsai: A Beginner's Read more

Bonsai Watering 101: Everything You Need to Know

The Essential Guide to Bonsai Watering: Unlocking the Secrets of Miniature Tree Care Understanding the Art of Bonsai Watering: A Read more

A note to our visitors

This website has updated its privacy policy in compliance with changes to European Union data protection law, for all members globally. We’ve also updated our Privacy Policy to give you more information about your rights and responsibilities with respect to your privacy and personal information. Please read this to review the updates about which cookies we use and what information we collect on our site. By continuing to use this site, you are agreeing to our updated privacy policy.

Bonsai Trees and Supplies Direct From the Grower !
Automated SEO Heist